
6 November 2023 | IT Tips
Have you ever wondered how to unleash the potential of Microsoft OneNote? If you’re new to this powerful tool or want to dive deeper into its capabilities, check out our previous blog on Unleashing the Potential of Microsoft OneNote.
Now, let’s get started with the basics. In this blog post, we’ll guide you through the installation process and provide an overview of OneNote’s interface. Whether you’re a student, professional, or simply looking to enhance your organization, OneNote can be your digital notebook for greater productivity.
Installing OneNote
For Windows
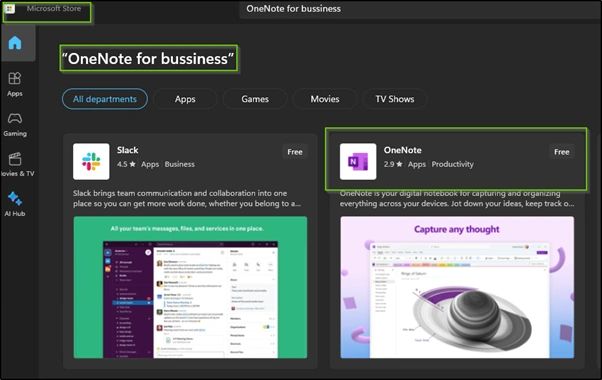
1. Open the Microsoft Store on your Windows computer.
2. Search for “OneNote” and click “Install.”
3. Once installed, launch OneNote from the Start menu.
For Mac
1. Visit the Mac App Store.
2. Search for “OneNote” and click “Get” to install it.
3. After installation, open OneNote from your Applications folder.
For iOS (iPhone/iPad)
1. Go to the App Store on your iOS device.
2. Search for “OneNote” and tap “Get” to install.
3. Launch OneNote after installation.
For Android
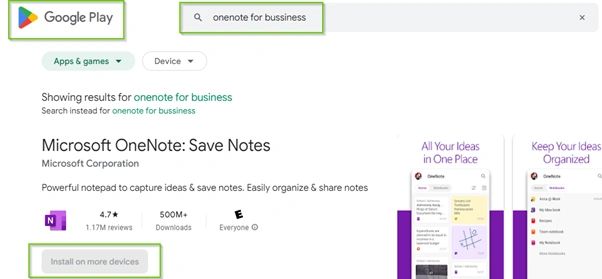
1. Open the Google Play Store on your Android device.
2. Search for “OneNote” and tap “Install.”
3. Once installed, open OneNote from your app drawer.
Setting Up Your Account
When you open OneNote for the first time, you’ll be prompted to sign in. Use your existing Microsoft account if you have one. If not, you can create a new one for free. Signing in allows you to sync your notes across devices.

Overview of the OneNote Interface
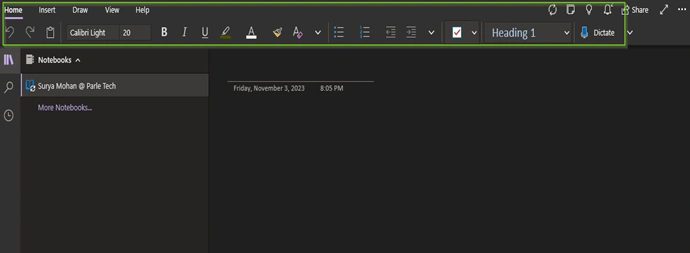
OneNote is like a digital notebook with Notebooks, Sections, and Pages. The ribbon at the top has all the tools you need, such as text formatting, drawing, and more.
Creating Your First Notebook
1. Click “File” in the top left corner.
2. Select “New” and then “Notebook.”
3. Give your notebook a name and choose where to save it.
4. Click “Create” to make your first notebook.
Navigating in OneNote
1. Click on the notebook name to switch between notebooks.
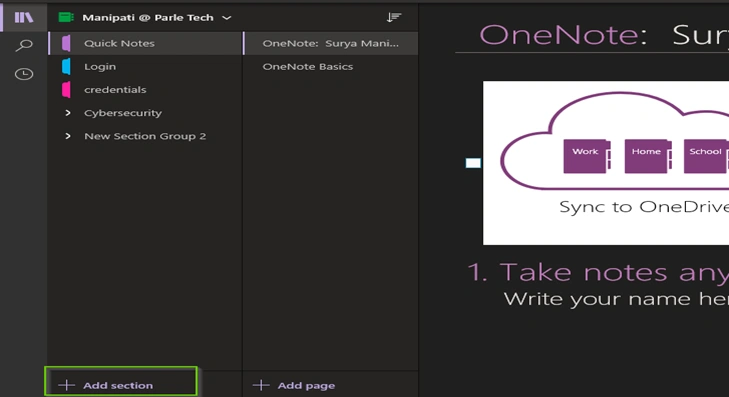
2. In a notebook, you have sections on the right and pages on the left.
3. Use the search bar to find notes quickly.
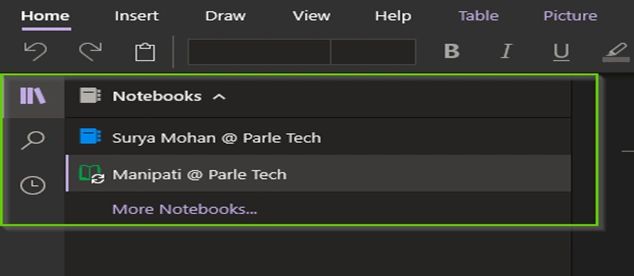
Customizing OneNote
1. Click on “View” in the ribbon to change the color or theme.
2. You can organize your notebooks by right-clicking and creating new sections.
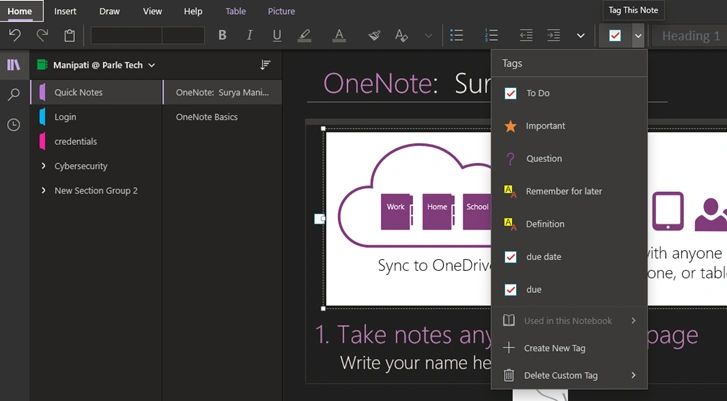
3. Use tags to mark important notes or tasks.
Syncing Across Devices
Your notes automatically sync to OneDrive, Microsoft’s cloud service. Sign in with the same account on your other devices to access your notes everywhere.
Troubleshooting and Support
If you have issues, visit the official OneNote support page on Microsoft’s website. There, you can find solutions, tips, and even contact Microsoft support if needed.
With these simple steps and an understanding of OneNote’s interface, you’re ready to start creating digital notebooks and improving your note-taking and organization skills. OneNote’s versatility and syncing capabilities make it a powerful tool for personal and professional use. Give it a try and explore all the possibilities it offers for organizing your digital world.
“Stay connected with Parle Technologies and learn more about OneNote.”
Share this post: